Sunday, January 16, 2011

Stuffed "Muffuletta" Flank Steak


TS:
Oh my, it's been a while since we last surfaced! So yeah, belated Happy New Year to all! ;D


TS:
Some of you may remember the muffuletta we made about two years ago. (Wow, it's been that long?!)

Oh, wait, you don't?


TS:
That towering muffuletta sandwich has salami, mortadella, Provolone cheese, and most importantly, an "olive salad".

http://en.wikipedia.org/wiki/Muffuletta
http://en.wikipedia.org/wiki/Central_Grocery

The mere thought of that olive salad is enough to make my mouth water.


TS:
I mean, just look at that! The olive salad is a mixture of green olives, black olives, roasted bell peppers, sun-dried tomatoes, some garlic, some dried oregano, lemon juice and olive oil. Oh, and some parsley too.


TS:
So, when we had some flank steak sitting in the fridge, we thought, "Why not stuff it with the muffuletta flavors that we love?" And so we did.


TS:
I semi-butterflied the flank to even out the thickness, then layered a few pieces of salami, mortadella and Provolone cheese near one end. A generous amount of olive salad went on top of those ingredients, then I rolled the beef and tied it up.

My first attempt at butterflying flank steak resulted in some tears and such. Oops.


TS:
I seared the outside of the rolled flank, then finished it in the oven. As you can see, the Provolone oozed out a bit from the tears in the meat. But, no biggie.


TS:
We already know we love these muffuletta flavors, so it was no surprise that this dish was a success! Really, that olive salad is killer.

One little flank like that did not actually last until dinnertime; we treated it as an afternoon snack.

Enjoyed this post? Why not subscribe to our blog? Subscribe via reader or subscribe via email. Thank you!


Recipe
Stuffed "Muffuletta" Flank Steak

1 piece flank steak
salami, sliced
mortadella, sliced
Provolone cheese, sliced
olive salad (recipe below)

Preheat oven to 350F/374F.

Butterfly and/or pound the flank steak until even in width. Place slices of Provolone cheese, salami and mortadella near one end of the steak. Spread the olive salad (use as much or as little as you wish) on top of the other stuffing ingredients. Roll flank steak and tie with butcher's twine to make a roast.

Heat a pan over high heat, add a little bit of oil and sear the flank roast on all sides until brown. Place browned roast in the preheated oven for 20 to 30 minutes, or until desired doneness.

Let sit for a few minutes, slice, and serve.

Olive Salad
part of the Muffuletta recipe in America's Test Kitchen Family Cookbook

1 cup green olives, pitted and chopped
1 cup black olives, pitted and chopped
3/4 cup extra-virgin olive oil
4 ounces jarred roasted red peppers, drained and chopped (1/2 cup)
4 ounces oil-packed sun-dried tomatoes, drained and chopped (1/2 cup)
1/4 cup minced parsley
2 tablespoons fresh lemon juice
1 teaspoon dried oregano
1 garlic clove, minced

Mix, cover and refrigerate (8 to 24 hours).

Thursday, December 23, 2010

Claypot Chicken Rice (瓦煲雞飯)


TS:
A while back, while we were trying our hand at a few Cantonese dishes, we tried our hand at this one.

I am not sure if this is "Cantonese" per se, but we definitely see claypot rice dishes on the menu in Cantonese restaurants. I'm guessing that it's a Southern Chinese thing.


TS:
Claypot rice is another one of those "easy" dishes by which we are baffled. We just assume there are all sorts of secret techniques to which we are not privy.

Wikipedia: Claypot Chicken Rice

JS:
We just have no idea how claypots actually work.


JS:
From my mother's stories, she claims to have used claypots quite frequently back in the day. She claims that some dishes actually taste better when cooked in a claypot rather than in a metal pot.

How memory goes when time flies -- when we ask our mother how to use the claypot, she seems to have forgotten how the entire process works. So, we were left to our own devices, to figure out how to use the claypot that we bought.


JS:
I also have no idea if the claypot we bought was actually a good piece of equipment: being the cheapskate that I am, I of course looked for a claypot that has a "reasonable" price point. In the back of my mind, I realized that this budget-seeking impulse could lead to my downfall.

TS:
But, let's not get ahead of ourselves. Time to get cookin'.

Chicken, Chinese Sausage, Mushrooms


TS:
First, we marinated the chicken in a little soy sauce, Shaoxing wine, sesame oil, cornstarch and minced ginger. Well, the ginger is supposed to be minced, but as you can see, we got a little lazy in the mincing department.


TS:
Claypot rice dishes are generally simple, so besides the chicken, we only had two other components: Chinese sausage (lap cheung) and mushroom.

JS:
An easy "rice" dish we sometimes make is Chinese sausage rice, which involves cutting up the Chinese sausage into small pieces and putting them into the rice cooker with uncooked rice and water.

The result is delicious, with the Chinese sausage "juices" infusing the rice.


TS:
We reconstituted dried shiitake mushrooms until they were like fresh again. We also used the liquid for cooking the rice for extra mushroom flavor.

The Claypot


TS:
There it is, the mysterious claypot.


TS:
We figured we'd have to pre-cook the chicken somewhat, so we cooked them in the claypot for a little bit (not cooked all through).


TS:
The chicken set aside and the claypot all crusty with good chicken bits...


TS:
...we added the rice and water into the pot. Um, I guess we should dump everything else into the pot too. In went the chicken, mushrooms and Chinese sausage. We simmered this for quite a while until the rice was cooked.


JS:
Of course, I thought, in the way lazy people think, why not just put the chicken pieces, the Chinese sausage, mushrooms in the rice cooker to cook?

I guess it wouldn't be chicken CLAYPOT rice if I did that.

TS:
Whoa, that claypot is getting a tad too full. Why do we always end up with a lot of food?


TS:
So guess what? Since we had a lot of chicken rice to make, we did end up cooking the rest in the rice cooker! We plopped the ingredients in the rice cooker and pressed the button to "cook". Easy. Definitely not a mystery.

The Sauce, another mystery


TS:
Ah, but here's yet another one. When we order claypot rice in Cantonese restaurants, it is always accompanied by a sauce, served in a separate dish, that is then poured into the claypot.

For the life of me, I have no idea what this "mystery" sauce is!

It is definitely not just soy sauce!

So, we tried to make something up. We started with premium dark soy sauce; it is not very salty at all, but very luxurious. It was a bit too much by itself. So, we added some chicken stock, then seasoned with Shaoxing wine, sugar and five-spice. This was heated on the stove for a bit.

The Claypot Cracked!


TS:
A mini disaster occurred during the making of this dish, though. We discovered a crack in our claypot while the rice was cooking!

Of course, JS believes that the "cheap" claypot we bought was defective. But, after finally reading about claypots and how to use them --

and by "finally", I mean that I have just finished reading this important information right now while writing this post and not six months ago when we were actually using the claypot --

I believe we made the error of using high heat when we were "pre-cooking" our chicken. So, don't make the mistake we did. Read about how to actually use claypots before using one.

About.com: How to Cook with a Claypot
Chinese Clay Pot Cooking is Magic


I guess we just need to wait for another sale on claypots and get ourselves another one!


TS:
Mini-disaster aside, our claypot rice was nice enough. The rice had turned quite brown on the bottom and on the sides of the claypot. We poured our mystery sauce over the rice and tasted the dish.

By golly, it seemed like it was close to restaurant claypot rice. Well, OK, I wouldn't go that far. ;)

But, it was still very tasty and the mystery sauce was a little reminiscent of the sauce served in the restaurants.

A success, in its own way.

We consider this our starter claypot rice. As you can imagine, the possibilities for claypot rice are endless!


eatingclub Hong Kong/Cantonese
Chicken Chow Mein
Cantonese Braised Beef Brisket, Two Ways
Lobster Congee from a Lobster Feast
Chinese Roast Pork Belly
Gailan (Chinese Broccoli) with Oyster Sauce, Two Ways
Chinese Pork Bone Soup with Carrots and Water Chestnuts
Hong Kong-style Curry Cuttlefish
Dimsum Seafood Trio: Black Pearl Prawn Toast, Scallop in Nest, Jewelled Rice Cup
Hong Kong-style Singapore Noodles (星洲炒米)
Hong Kong-style Stir-fried Water Spinach with Shrimp Paste (蝦醬通菜)
Hong Kong-style Stir-fried Rice Noodle with Beef (乾炒牛河)
Sweet and Sour Pork
Hong Kong-style Curry Beef Brisket (咖喱牛腩), 1st Attempt
Claypot Chicken Rice (瓦煲雞飯)

Enjoyed this post? Why not subscribe to our blog? Subscribe via reader or subscribe via email. Thank you!

Recipe
Chicken Claypot Rice
Serves 4 to 6

2 chicken legs and thighs, cut into pieces
2 chicken wings (optional)

1 teaspoon soy sauce
1 teaspoon Shaoxing wine
1 teaspoon sesame oil
1 teaspoon minced ginger
1 teaspoon cornstarch


2-3 pieces dried shiitake mushrooms, reconstituted in hot water
1-2 pieces Chinese sausage
3 cups rice
4 cups water

"Pouring Sauce"
1/2 cup dark soy sauce
1 1/2 tablespoons sugar
1/2 teaspoon five-spice powder
2 teaspoons Shaoxing wine
1/4 cup chicken stock

Marinate chicken in soy sauce, Shaoxing wine, sesame oil, minced ginger and cornstarch. Let sit for about 1 hour or so.

When you have about 10 minutes of marinating to go, place claypot on the stove and heat on the lowest setting.

Meanwhile, slice Chinese sausages and reconstituted mushrooms.

Heat oil in a wok or sauté pan over high heat, then add chicken pieces and cook until exterior turns color (no longer pink); they don't need to be browned. Set aside. Add rice to the wok and stir a few time, cooking for about 30 seconds to a minute.

Add the rice and water to the claypot. Turn the heat slightly higher, to medium-low or medium. Add the chicken, sliced Chinese sausages and sliced mushrooms to the claypot as well. When the mixture starts to bubble, cover and use the lowest heat setting.

Cook for about 45 minutes to an hour, checking every so often.

While the rice is cooking, make the pouring sauce. Combine all the ingredients for the sauce in a small pot. Heat until barely boiling. Set aside.

When the rice and chicken are cooked, turn off heat. Serve your dish in the claypot with the pouring sauce on the side. You can pour the sauce into the claypot or have each person pour the sauce into his/her individual serving. Enjoy!


Rasa Malaysia also made Claypot Chicken Rice with both a claypot and a ricecooker:
Claypot Chicken Rice
Claypot Chicken Rice (without Claypot)

Tuesday, December 14, 2010

Sichuan Ma Po Tofu (麻婆豆腐)


JS:
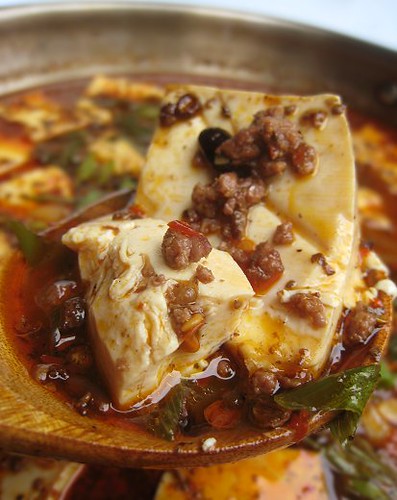
Ma po tofu is one of the most popular Chinese dishes around -- and I've eaten my fair share of ma po tofu over the years.

I hope I won't be losing my street cred here, but I must admit to liking ma po tofu in any guise. Around Vancouver, I've eaten and enjoyed ma po tofu in Cantonese restaurants and I've also ordered and enjoyed ma po tofu in Taiwanese restaurants.


JS:
Of course, these dishes bear only a passing resemblance to the Sichuanese, the supposed original. Surprisingly -- and how's this for a twist -- I haven't really enjoyed ma po tofu in any Sichuanese restaurants I've visited. Weird, wouldn't you say?

Wikipedia: Mapo doufu

So one day, I decided to try my hand at a home-cooked Sichuanese version of ma po tofu. I consulted Fuschia Dunlop's cookbook to start.

I was quite surprised that the recipe called for ground beef instead of ground pork. All my years eating ma po tofu, I've never had it with beef.

But, forged ahead I did.

"Specialty" Ingredients


TS:
First, some "specialty" ingredients are needed for this dish. One of these is Sichuan chili pepper flakes (四川辣椒).


四川辣椒 ("Sichuan chile pepper")TS:
I do not actually know what specific kind of chili pepper, except that it is usually labeled "Sichuan/Szechuan chili pepper". Best thing to do is go by the Chinese, as opposed to the English, description. These peppers do have quite a different aroma from regular chili flakes in regular supermarkets.


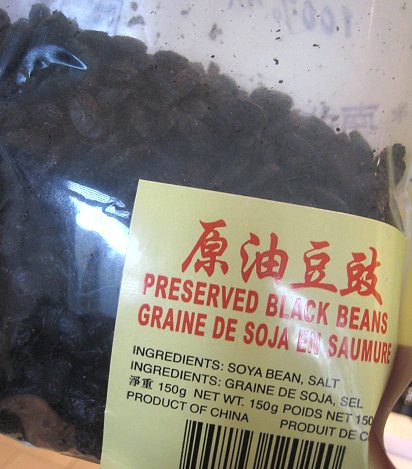
豆豉 (fermented black beans)

TS:
Another ingredient, probably not as unusual, is fermented black beans (豆豉).

These are the black beans in anything labeled "black bean sauce" on Chinese menus -- in Stir-fried Pork with Black Bean Sauce, for example. Or, the classic clams with black bean sauce. We have also used these before to quickly add flavor and seasoning to dishes, like in our Steamed Fish and Tofu with Chinese Black Beans.

About.com: Chinese Food - Fermented Black Beans


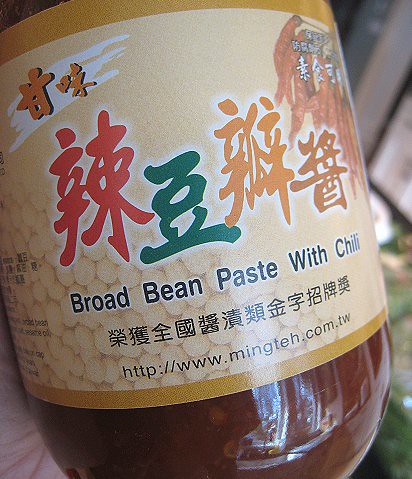
辣豆瓣醬 ("Broad Bean Paste with Chili")

TS:
My complaint about Fuchsia's book is that she does not include the Chinese names of the ingredients in her recipes. As some of you may have already experienced, describing something as "bean paste" is not very helpful at all!

Wikipedia: Doubanjiang

In the "Sichuanese Pantry" section of her book, she describes "chili bean paste" and includes the Chinese, 豆瓣醬 (dou ban jiang). She also includes a few sentences about a "Pixian bean paste" (no Chinese term included). However, in the actual recipe, she refers only to a "Sichuanese chili bean paste".

So, we used la doubanjiang (辣豆瓣醬), which is bean paste with chili.


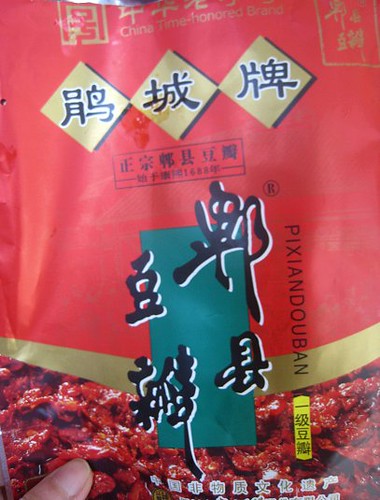
郫县豆瓣酱 (Pixian bean paste)

JS:
It turns out, or I'm assuming, that I actually needed Pixian bean paste (郫县豆瓣酱), which is a tad different from the normal dou ban jiang (豆瓣醬) we use for other dishes. Pixian bean paste is a fermented broad bean paste, and boy is it potent!


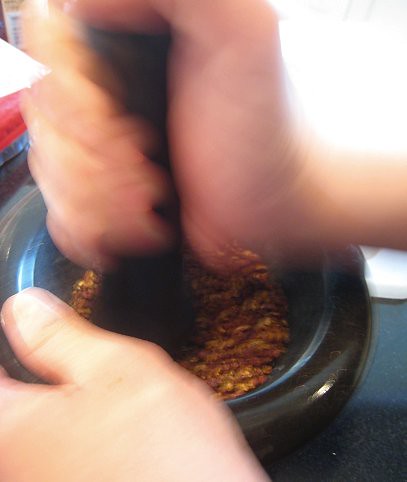
花椒 (Sichuan peppercorns)

TS:
Of course, one must not forget Sichuan peppercorns (花椒)! They taste citrus-y, with an unmistakable numbing sensation.

JS roasted the Sichuan peppercorns first, then ground them in a mortar and pestle.

Wikipedia: Szechuan peppercorn


TS:
Fuchsia did not specify the type of tofu/bean curd needed for the dish! [sigh... Fuchsia.]

JS:
The recipe called for blanching the tofu, I think to get rid of the excess water. Well, given that I tend to be rough in handling tofu, I figure if I blanched them first, I would be left with curds. So, I simply cut them into large cubes.


TS:
JS went ahead and used ground pork. This was sautéed first, then the chili bean paste was added. We used both the doubanjiang with chili (辣豆瓣醬) and the Pixian bean paste (郫县豆瓣酱). The fermented black beans (豆豉) and the chili flakes (四川辣椒) went in next.

At this point, the oil should be a nice red color from the bean paste(s) and the chili flakes.

The recipe calls for adding stock, then the tofu. The whole lot is seasoned with sugar, soy sauce and salt, then simmered for a few minutes.

To get a nice luxurious consistency to the sauce, a cornstarch slurry (cornstarch dissolved in cold water) is used. Then, sliced baby leeks, or green onions in our case, and the ground roasted Sichuan peppercorn (花椒) are the finishing touches to the dish.


JS:
This version of ma po tofu turned out to be more watery than I wanted. One reason may be because I skipped the tofu-blanching in the beginning. But I also think that there was too much chicken stock in the recipe. I suppose I could have let the dish reduce further but impatience got the better of me. I turned off the stove and served my slightly watery ma po tofu.

I was also quite disappointed with the heat level in the dish, or the lack thereof. Fuchsia warned us that adding the ground Sichuanese chiles was "only for chile fiends", but this dish was not hot at all! Well, it all ended well, I suppose, as the kiddies also ate this up.

Our first Sichuan Mapo Tofu was still delicious, despite its shortcomings. But I know what to do, or what not to do, next time.

TS:
P.S. I've included the Chinese terms in the recipe below for ease in looking for ingredients.


eatingclub Sichuan/Sichuan-inspired (Szechuan)
Red Chile Oil (紅油)
Sichuan Peppercorn Chili Oil
Spicy Sweet Sichuan Popcorn
Gong Bao ("Kung Pao") Chicken (宮保雞丁)
Eggplant Dandan Mian (擔擔麵)
Sichuan "Crossed Hands" Wonton Dumplings 抄手, Two Ways (in Broth and with Chili Oil Sauce)
Sichuan Ma Po Tofu (麻婆豆腐)
Water Boil Fish (水煮魚) or Water Boil Beef (水煮牛肉)

Enjoyed this post? Why not subscribe to our blog? Subscribe via reader or subscribe via email. Thank you!

Recipe
Pock-marked Mother Chen's Bean Curd
from Fuchsia Dunlop's Land of Plenty: A Treasury of Authentic Sichuan Cookingour notes/comments in green

Serves 2-3 as a main course with one vegetable dish and rice, 4 with three other dishes

1 block bean curd (about 1 pound)
we used soft tofu

4 baby leeks or 2 leeks
we used green onions
1/2 cup peanut oil
6 ounces ground beef
we used ground pork
2-1/2 tablespoons Sichuanese chili bean paste
we used both chili bean paste (la doubanjiang, 辣豆瓣醬) and the Pixian bean paste (郫县豆瓣酱)
1 tablespoon fermented black beans (豆豉)
2 teaspoons ground Sichuanese chiles (only for chile fiends) (四川辣椒)
1 cup "everyday stock" or chicken stock
we would use less liquid next time
1 teaspoon white sugar
2 teaspoons light soy sauce
salt to taste
4 tablespoons cornstarch mixed with 6 tablespoons cold water
1/2 teaspoon ground roasted Sichuan pepper (花椒)

1 Cut the bean curd into 1-inch cubes and leave to steep in very hot or gently simmering water that you have lightly salted. Slice the leeks at a steep angle into thin "horse ear" slices 1-1/2 inches long.

2 Season the wok, then add the peanut oil and heat over a high flame until smoking. Add the minced beef and stir-fry until it is crispy and a little brown, but not yet dry.

3 Turn the heat down to medium, add the chili bean paste and stir-fry for about 30 seconds, until the oil is a rich red color. Add the fermented black beans and ground chiles and stir-fry for another 20-30 seconds until they are both fragrant and the chiles have added their color to the oil.

4 Pour in the stock, stir well, and add the drained bean curd. Mix it in gently by pushing the back of your ladle or wok scoop gently from the edges to the center of the wok -- do not stir or the bean curd may break up. Season with the sugar, a couple of teaspoons of soy sauce, and salt to taste. Simmer for about 5 minutes, until the bean curd has absorbed the flavors of the sauce.

5 Add the leeks or scallions and gently stir in. When they are just cooked, add the cornstarch mixture in two or three stages, mixing well, until the sauce has thickened enough to cling glossily to the meat and bean curd. Don't add more than you need. Finally, pour everything into a deep bowl, scatter with ground Sichuan pepper, and serve.

LinkWithin Related Stories Widget for Blogs